MQTT Stopwatch / Display
MQTT Stopwatch / Display
Parts to Buy
Parts to 3d Print
Mechanical Assembly
CircuitPython Setup
Software
The Secrets File
The Config File
Message Protocol
Setup Your Own Broker
Extending
Mechanical Assembly (MQTT Stopwatch / Display)
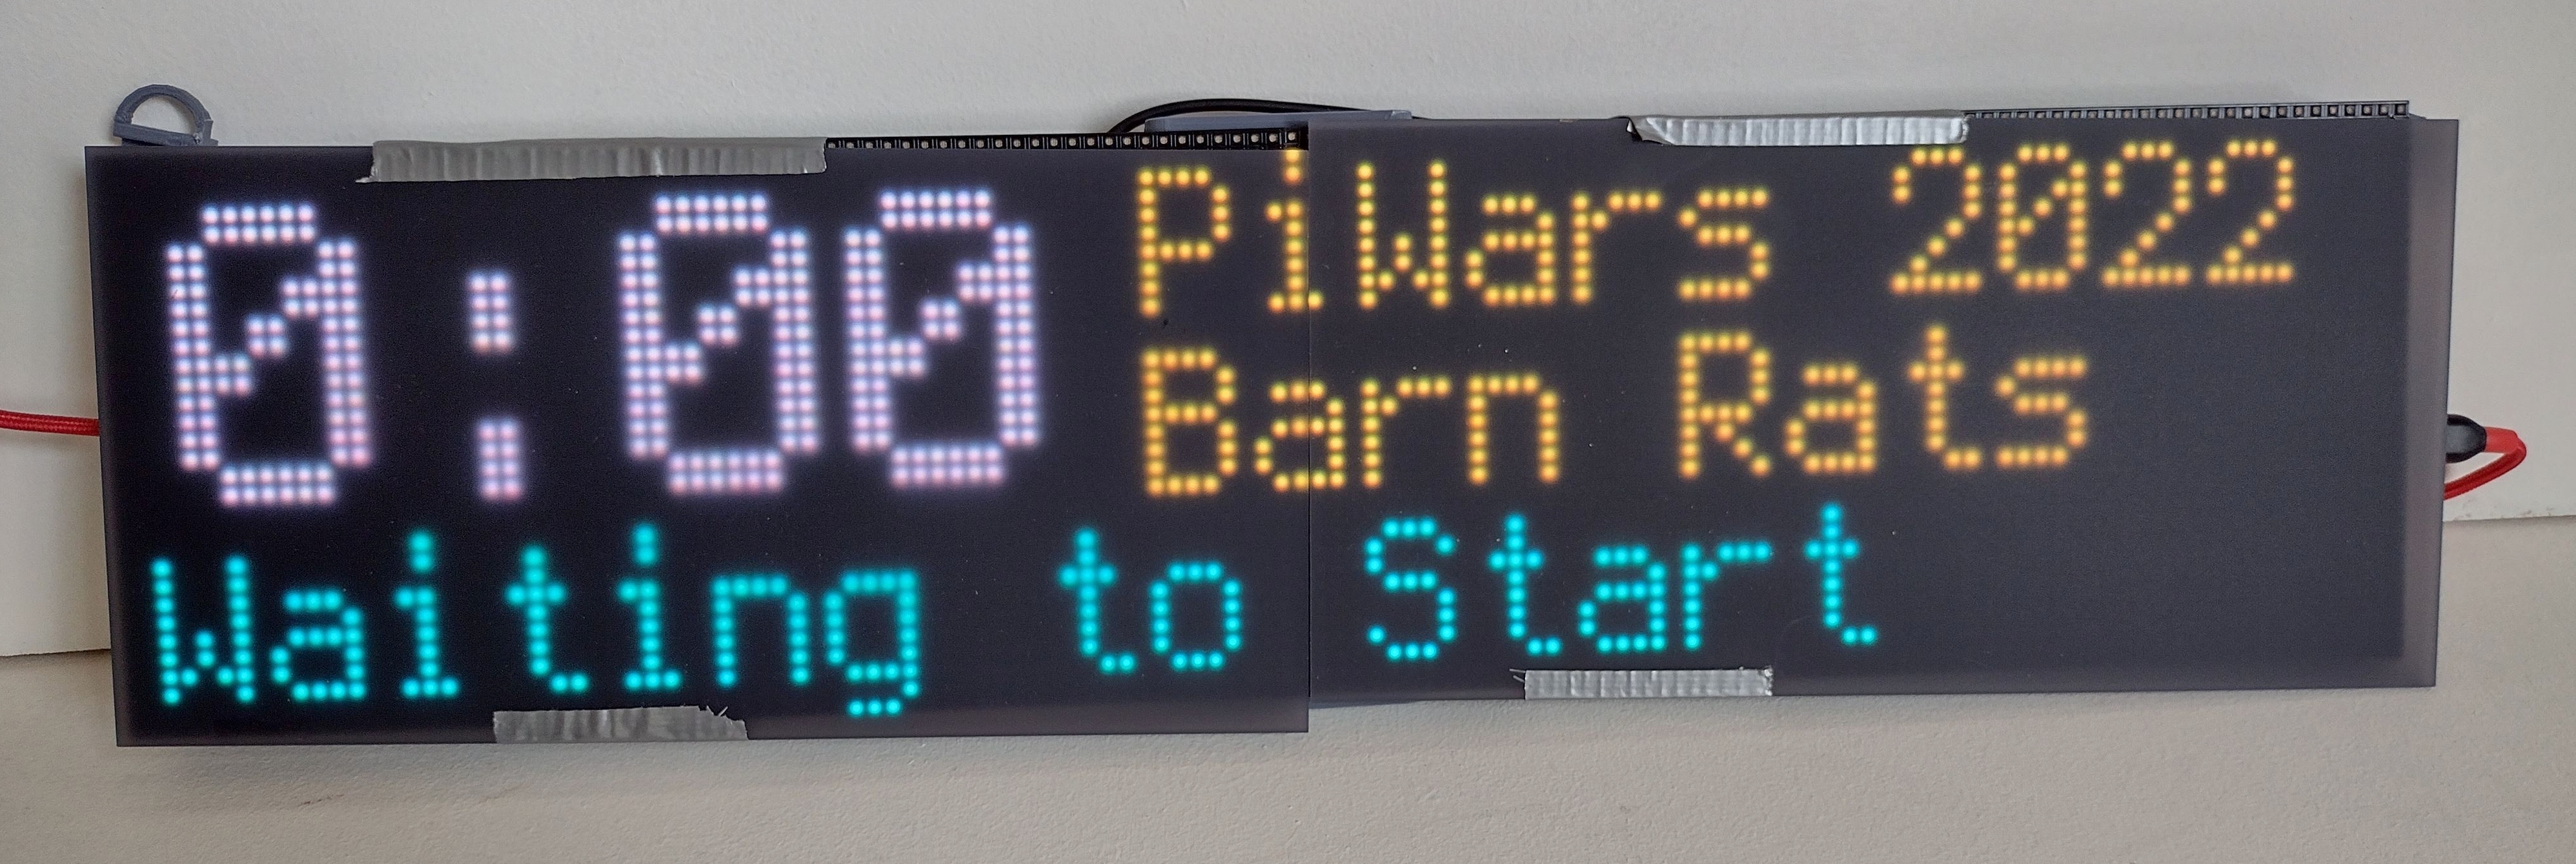
Assemble the 2 Matrix Panels as shown in the image below, using 2 of the 3d-printed joiners described in the preceding page (or duct tape works too, it just doesn't look quite as cool...). Note that the "L" shaped arrows silkscreened on the back point to the TOP of the display. Use M3 x 6mm screws to attach the joiners.
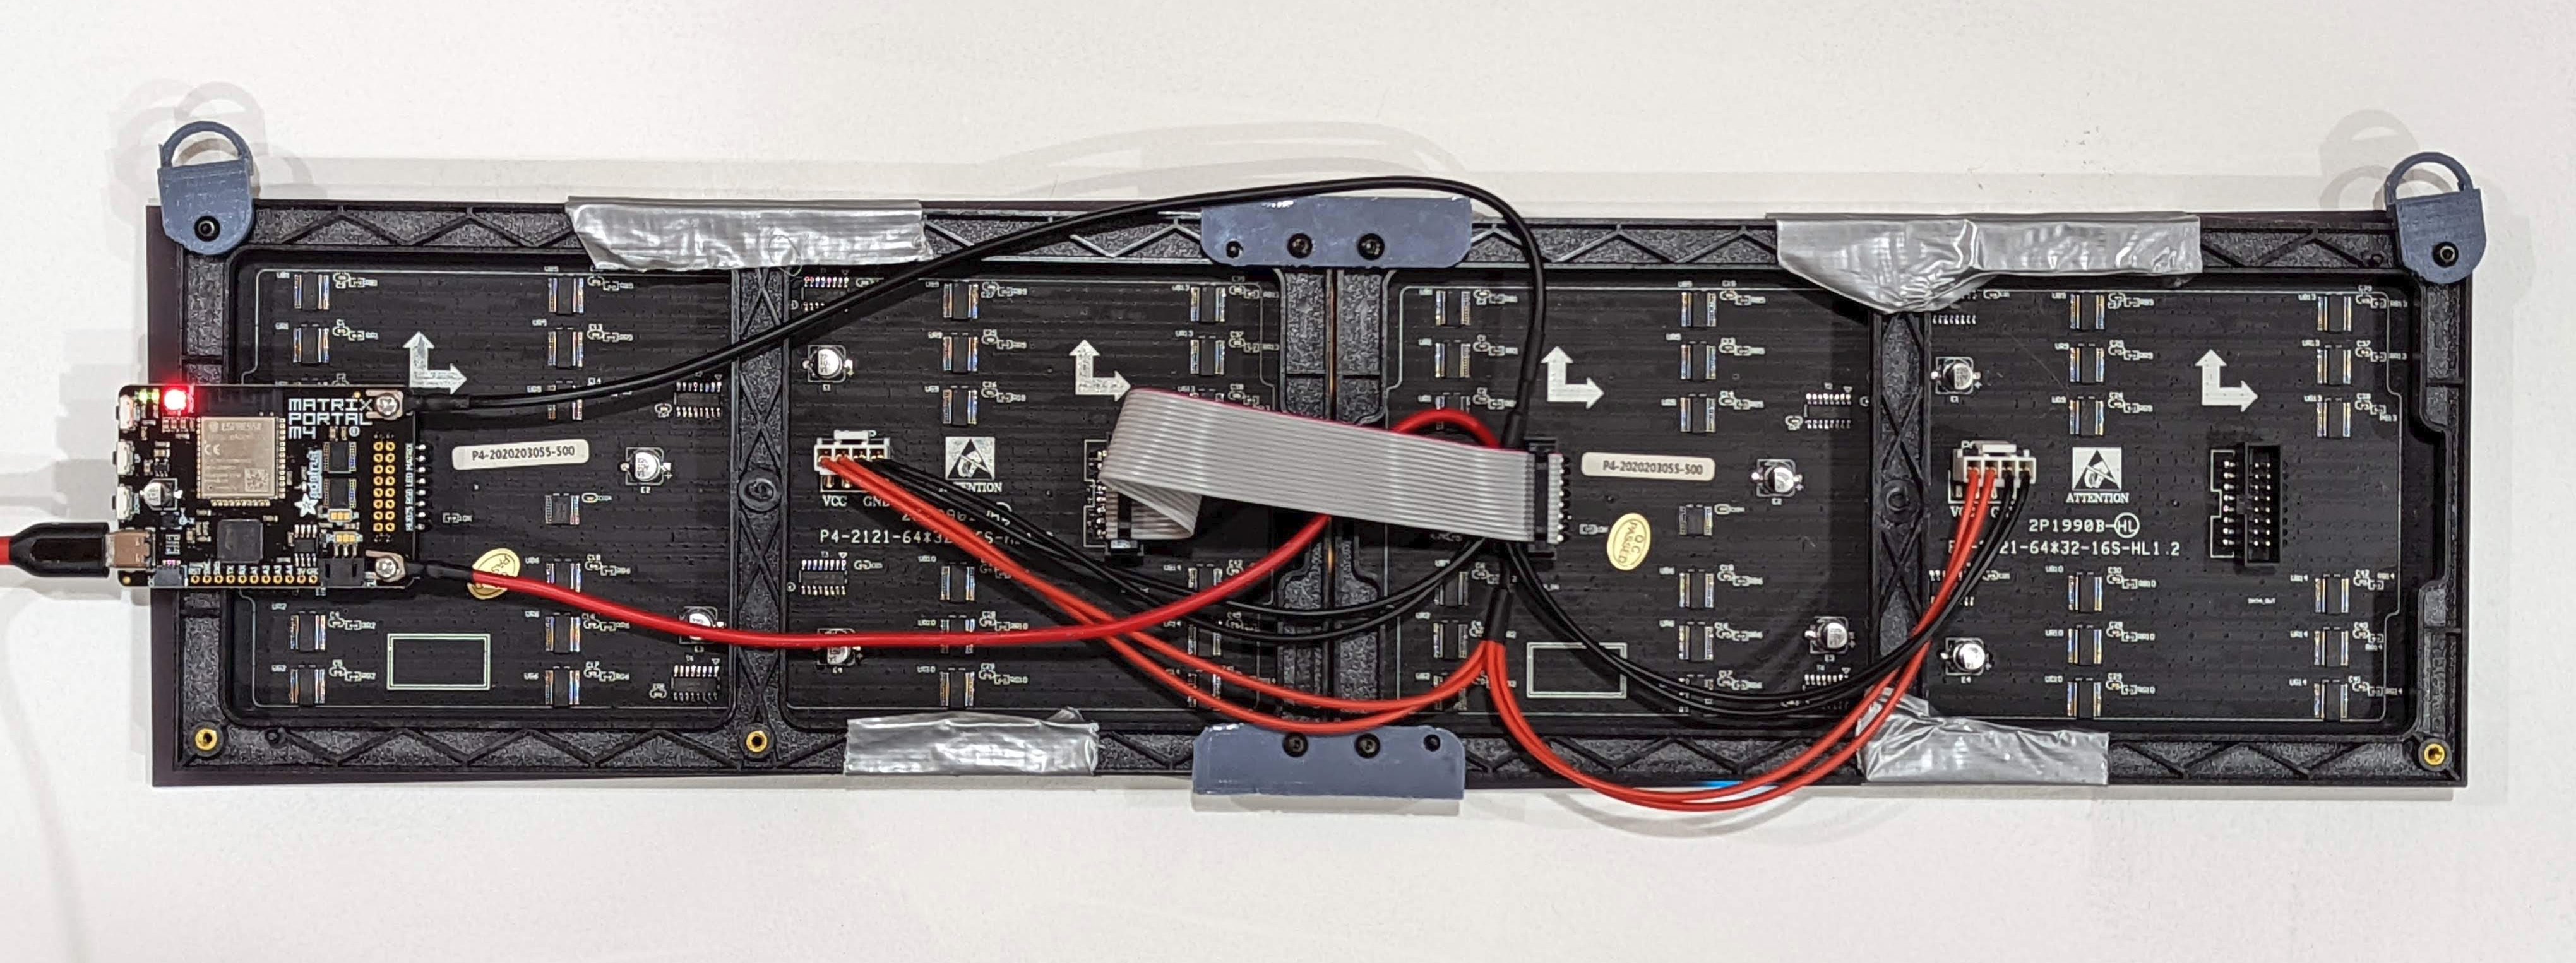
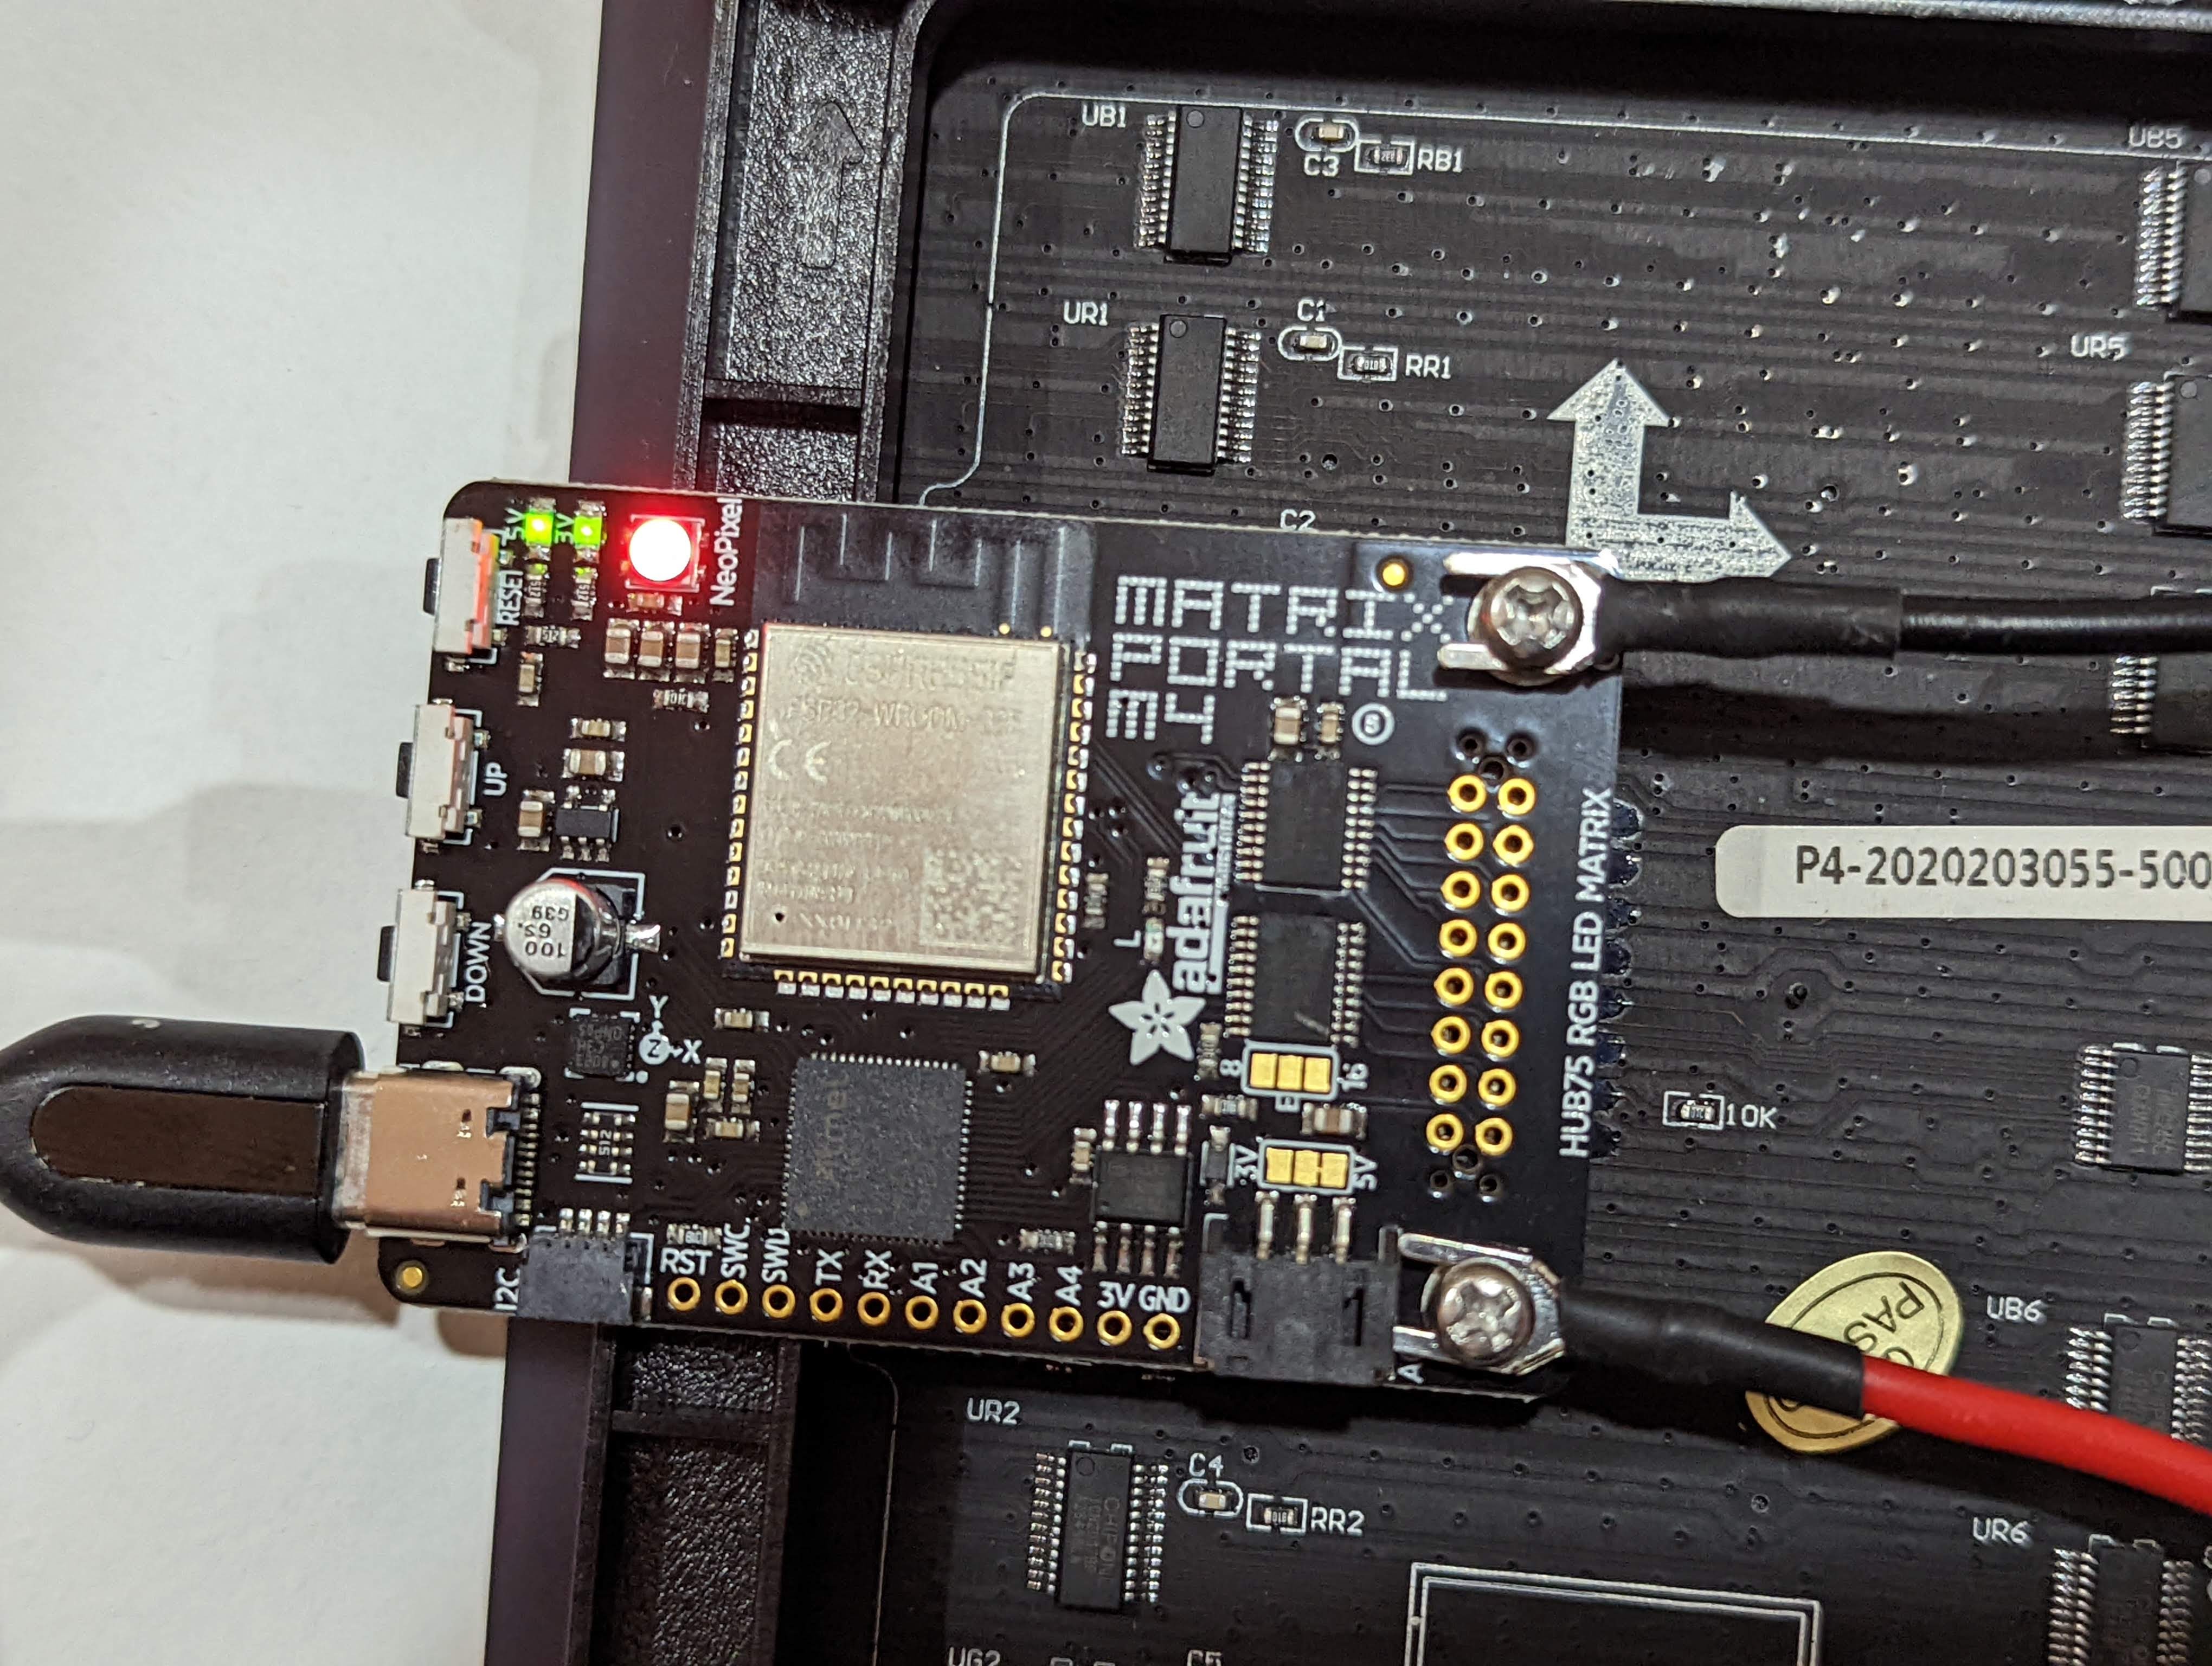
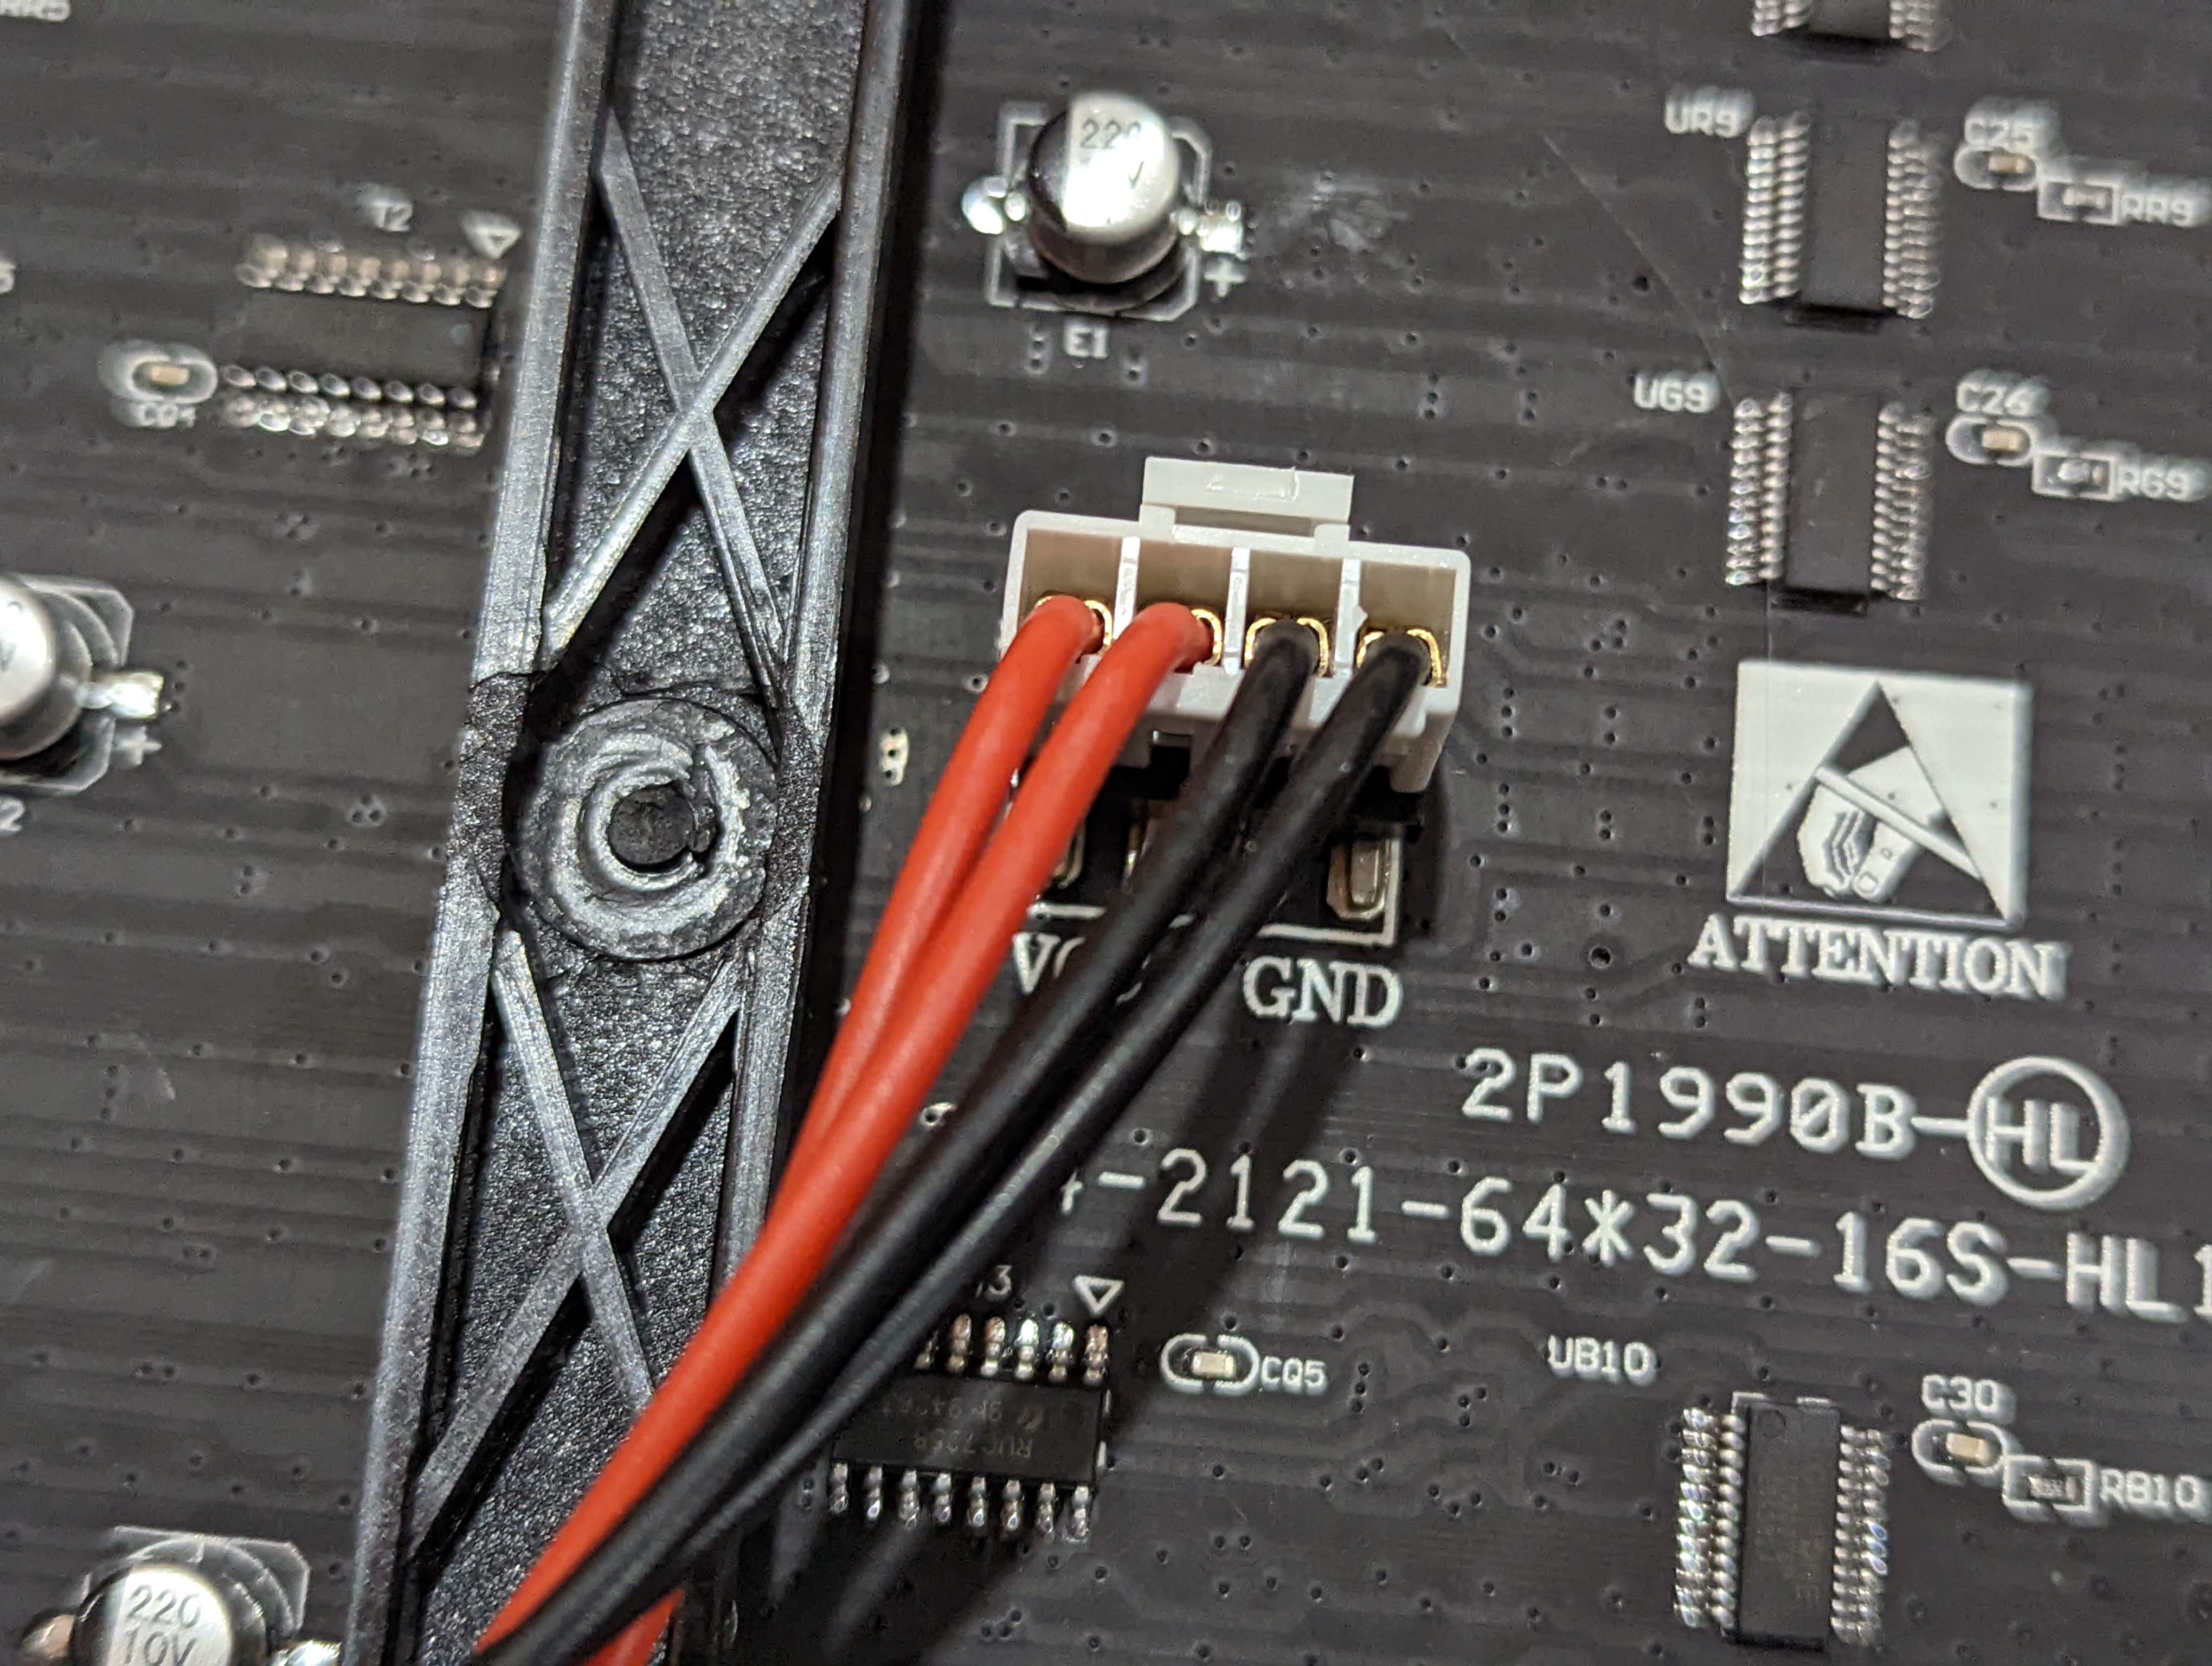
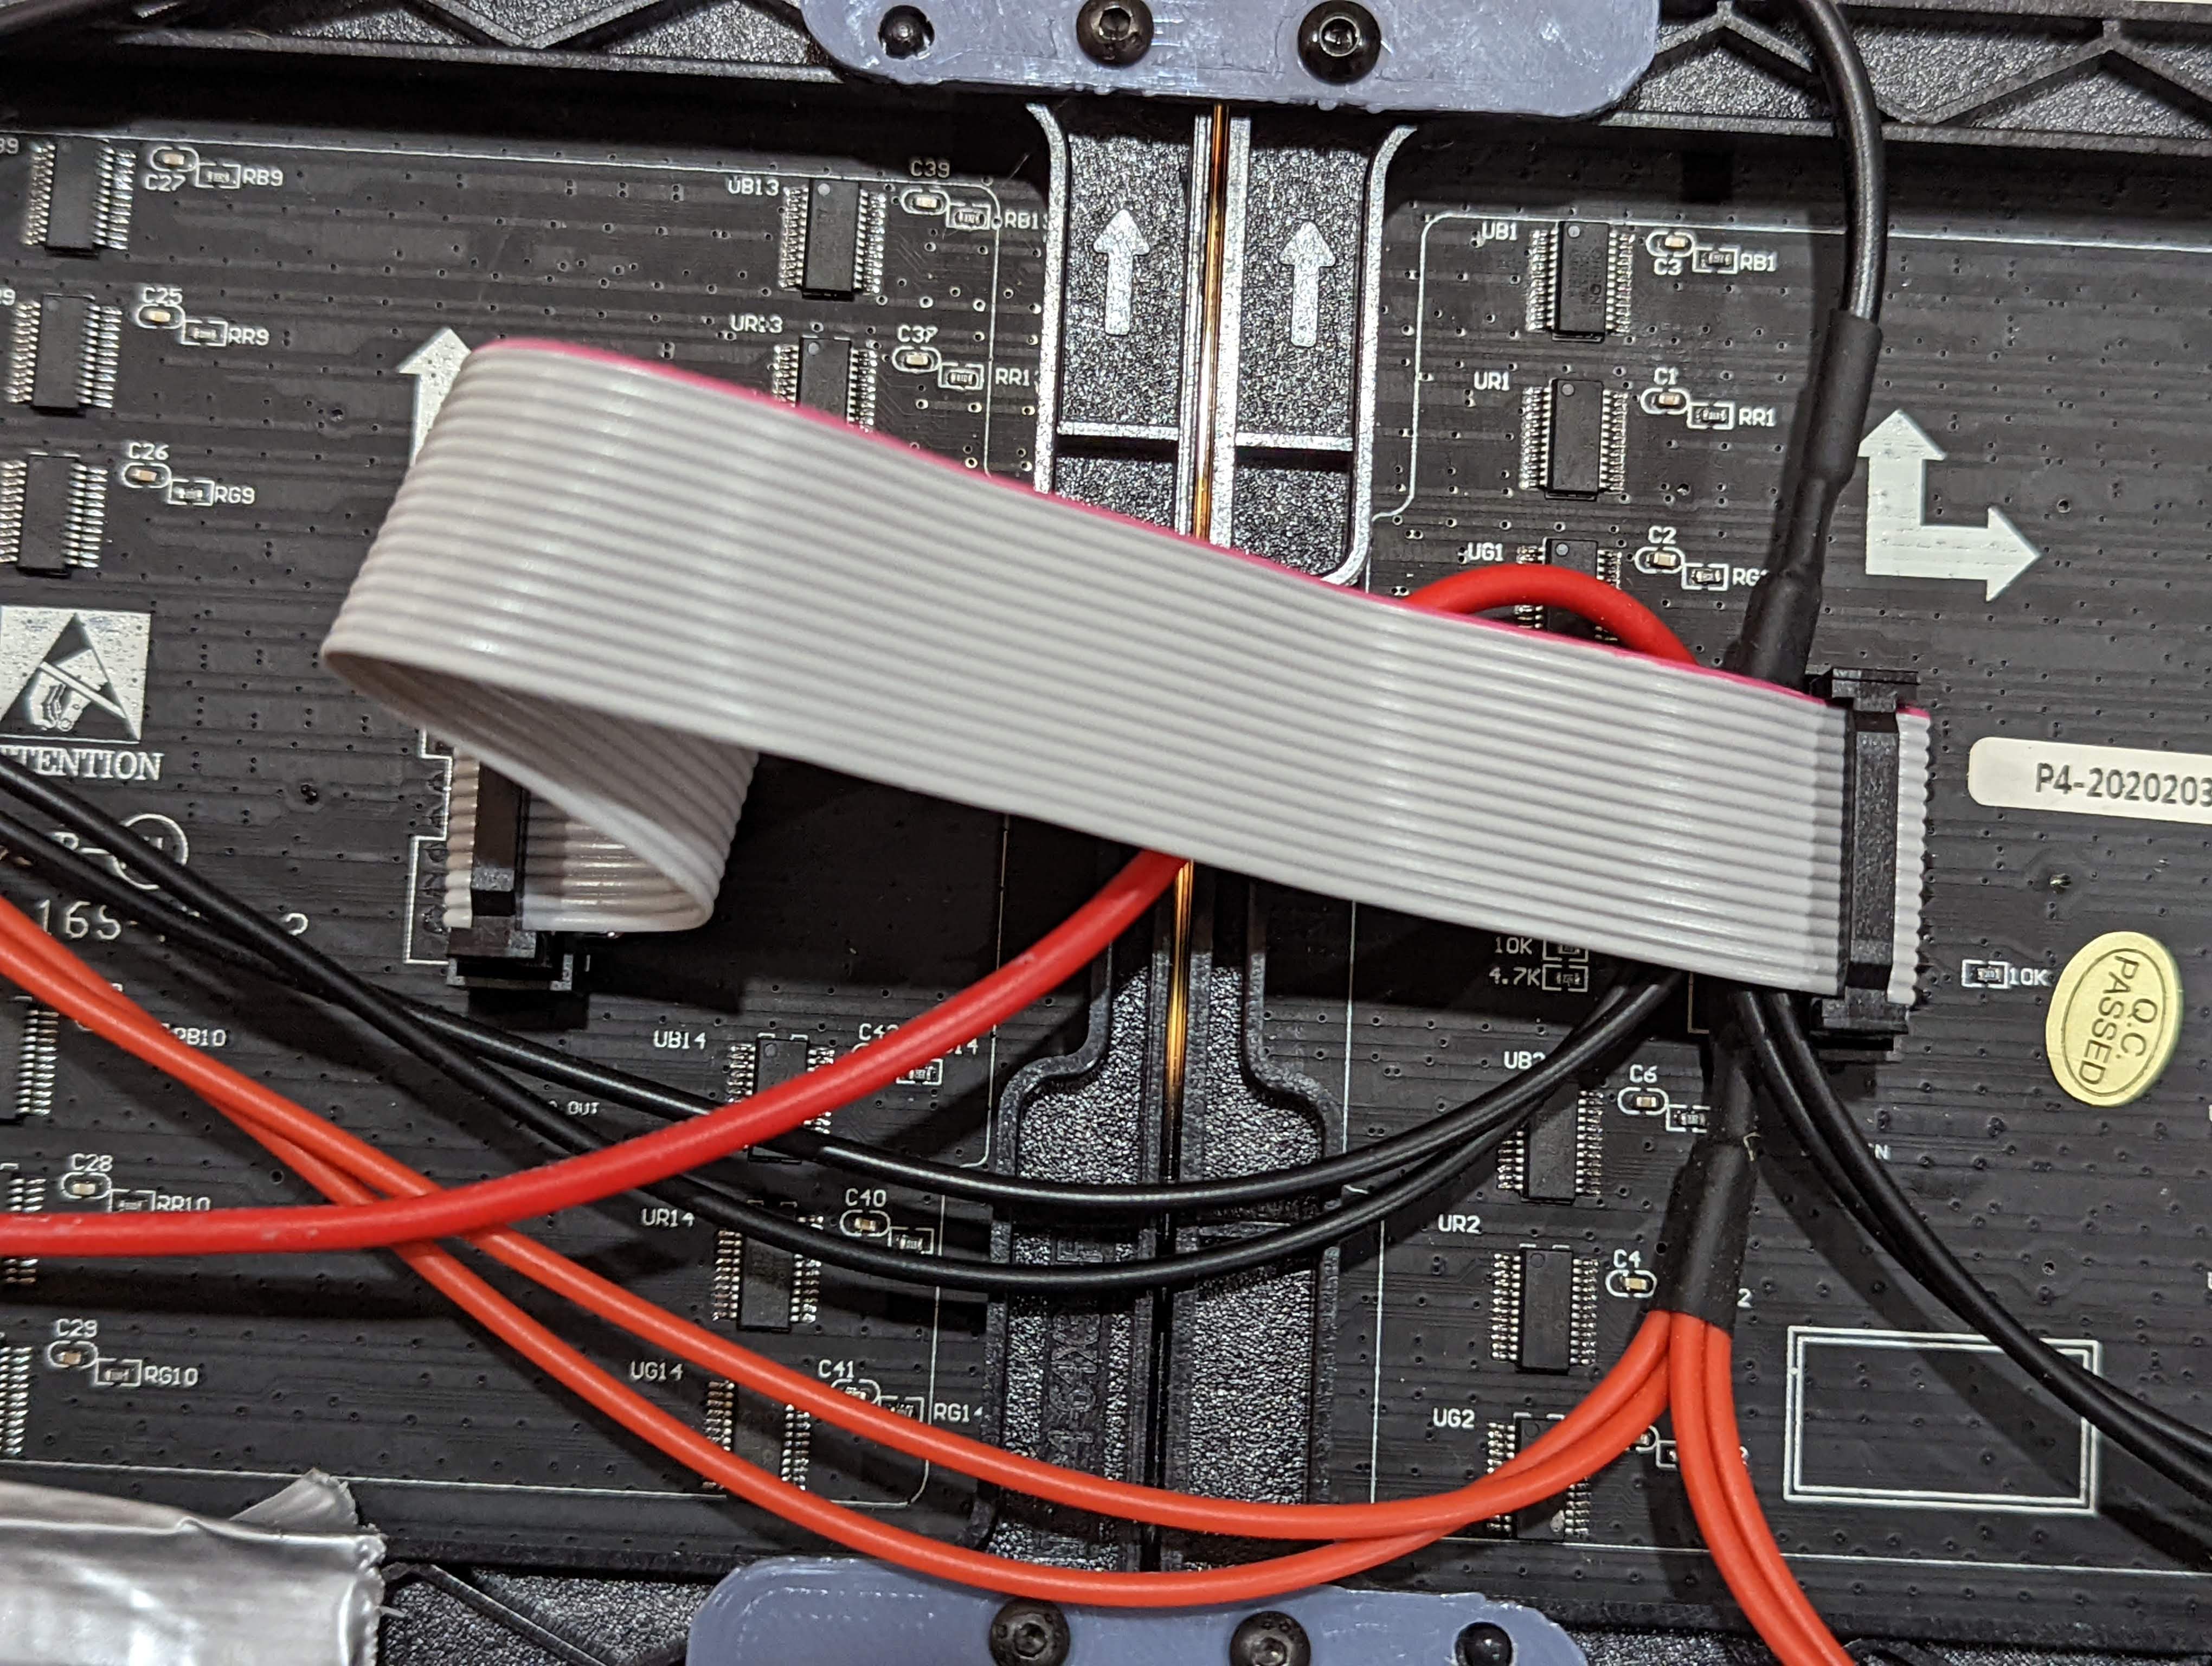
The MatrixPortal circuit board is mounted on the LEFT-MOST Matrix Panel (as viewed from the back). Note again the orientation of the silkscreened arrows. Use the provided ribbon cable to connect the 2 panels, as shown, and use the provided red/black wires to run power from the MatrixPortal to the 2 Matrix Panels (the red wire goes the the "5v" screw on the circuit board, the black wire goes to the "GND" screw..
Note that the USB-C connector on the Matrix Portal circuit board provides power to the whole assembly.